
Mastering Tongue Placement for R in American English
Mastering the American ‘r’ sound all comes down to finding the right tongue placement for r. But here’s the secret: there isn’t just one “correct” way to do it. Native speakers primarily use two different methods—the bunched r and the retroflex r. Your success depends on figuring out which of these tongue shapes feels more natural and intuitive for you.
Your Guide to Finding the Right R Sound
The American /r/ is notoriously tricky for a lot of English learners, often because it gets taught as a single, rigid movement. The reality is far more flexible.
Think of it less like a fixed target you have to hit and more like a destination you can reach by taking one of two different paths. The goal isn’t to force your tongue into some awkward, uncomfortable shape. It’s to really understand the mechanics behind the sound so you can finally produce it clearly and consistently.
This guide will demystify the process by breaking down the two main tongue placements we see in our coaching sessions:
- The Bunched R: This is the most common method, where the body of your tongue bunches up and pulls back in your mouth.
- The Retroflex R: This is the alternative, where the very tip of your tongue curls upward and back.
Understanding both gives you the power to experiment and find what actually clicks. It’s all about building that crucial awareness and control—the same foundational skills needed for overall clear enunciation. If you’re working on improving your clarity across the board, our guide on how to enunciate better offers some great exercises that pair perfectly with this R-sound practice.
Why Are There Two Ways to Make the R Sound?
So, why the two options? It really just comes down to the incredible adaptability of human anatomy. Research using MRI scans has shown that while speakers use very different internal tongue shapes, the sound that comes out is perceived as a perfectly normal American /r/.
These studies confirm what we see in practice: the American R is produced using either a ‘bunched’ or ‘retroflex’ tongue position, and there’s a huge amount of variability even among native speakers. You can dive deeper into the articulatory findings here to see just how adaptable our mouths can be.
This is fantastic news for you as a learner. It means you don’t have to perfectly copy one specific model. Instead, you can focus on the core principles—creating the right tension and airflow—using whichever tongue shape gives you the best results.
The Hidden Mechanics of the R Sound
To really get the American R right, we have to look past the tip of the tongue. The real secret is creating a very specific shape inside your mouth, a shape that produces what I call the “two crucial narrowings” of your vocal tract. This is why just curling your tongue back often doesn’t work—it misses the most important part of the equation.
Success with the R sound is all about generating the right kind of muscular tension. This isn’t a lazy, relaxed sound; it’s an active, deliberate one. The single most important action is bracing the sides of your tongue firmly against your upper back teeth, or molars. This creates a stable anchor and stops air from spilling over the sides, which is what causes that “slushy” or unclear sound many learners struggle with.
This bracing is just one piece of the puzzle. To make a proper R, the entire tongue tenses up and pulls back slightly in your mouth. Whether you end up with a bunched or a retroflex R, this foundational tension and retraction are completely non-negotiable.
The Two Crucial Narrowings
This idea of “two narrowings” is what unlocks a consistent, strong American R. One narrowing, or constriction, happens toward the front of your mouth (either with the bunched-up body of the tongue or the curled-back retroflex tip). At the same time, a second constriction happens much further back, near the root of your tongue.
As you can see in the diagram below, both the bunched and retroflex R use different shapes to achieve the exact same acoustic result.
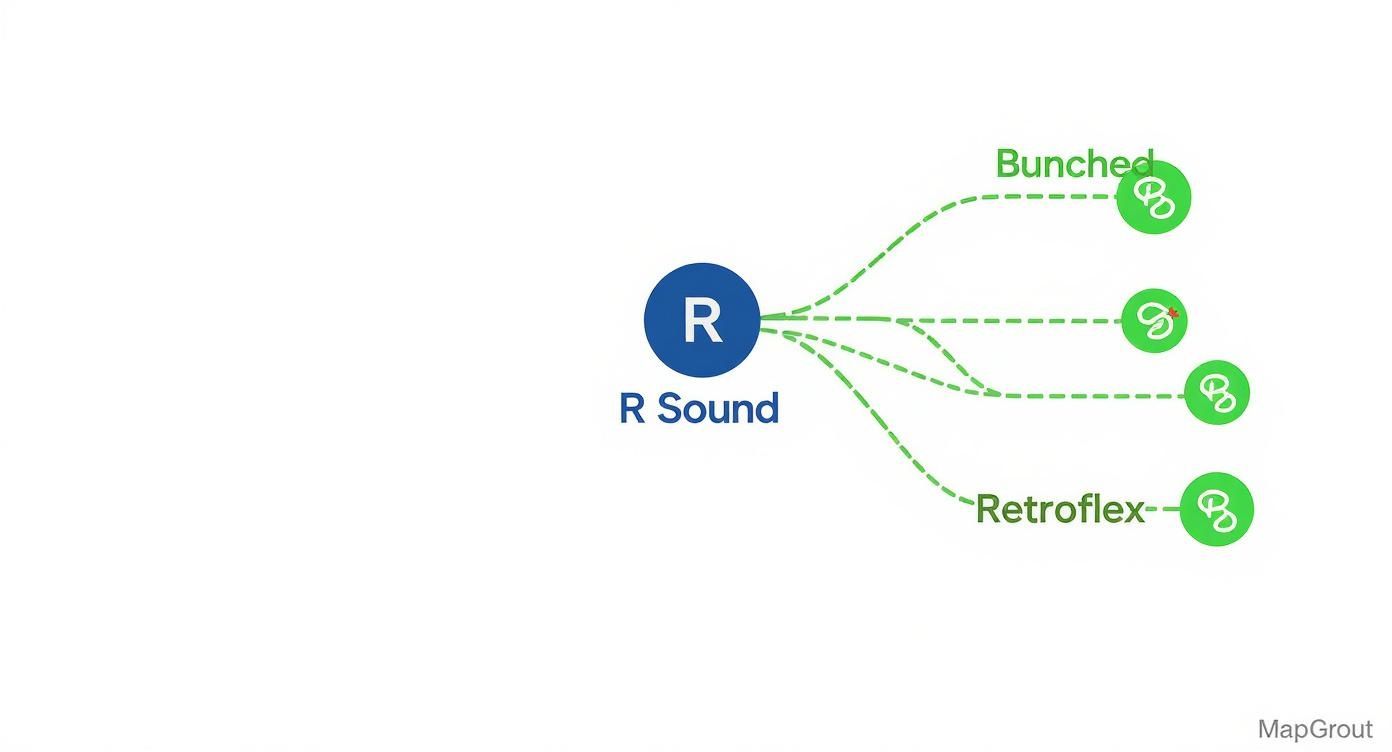
This visual makes it clear: while the front of the tongue can do different things, the back of the tongue is always engaged and pulled back to create that essential second narrowing.
“Understanding these mechanics is your key to self-correction. When your R sounds weak or incorrect, it’s almost always because one of these two narrowings is missing or isn’t tense enough.”
This isn’t just a coaching trick; it’s well-established in speech science. The unique sound of /r/ depends on creating these dual constrictions. That feeling of pressure around your molars is your best physical cue that you’re on the right track. This is how you move from just guessing to actually feeling the correct tongue position.
Building Your Sensory Awareness
Instead of just trying to copy a shape you see in a diagram, I want you to focus on the feeling inside your mouth. Can you actually feel the sides of your tongue pressing firmly against your upper molars? Is there a sense of tension running through the body of your tongue? These sensory cues are far more reliable than just looking at a picture.
Here are the tactile goals to aim for:
- Feel the Bracing: Actively push the sides of your tongue out against your top back teeth. It should feel like a strong, stable connection.
- Sense the Tension: The middle of your tongue should feel firm and engaged. Not floppy.
- Notice the Airflow: The air should channel smoothly over the center of your tongue, not escape out the sides.
Building this kind of awareness is a core principle in phonetics. In fact, if you want to take a deeper dive into how all the sounds of English are made, you might find our guide on how to improve English pronunciation with the IPA really helpful. This knowledge empowers you to become your own coach, diagnosing your errors and making precise adjustments to get that clear, confident American R.
How to Achieve the Bunched R Placement
For many learners, the bunched R is the more intuitive of the two positions, and it’s the one we see most often in our coaching sessions. The secret to this placement is shifting your focus away from the tip of your tongue and onto the main body. It’s less about a specific “curl” and much more about creating a solid, stable hump in the middle of your mouth.

Let’s walk through the exact mechanics. Start by relaxing your jaw and lips—they shouldn’t be overly tense or rounded. The primary action involves pulling the bulk of your tongue back and up toward the roof of your mouth. Think of your tongue gathering itself into a compact, muscular shape, almost like a small hill or bunch.
This specific shape isn’t just arbitrary; it’s a highly effective way to produce the sound. In fact, research from speech therapy settings backs this up. Studies suggest that around 60-70% of native English speakers naturally use this bunched position, which is why it’s often the first method taught to those needing articulation support. You can dive deeper into these insights on /r/ production from The Digital SLP.
Anchor the Sides of Your Tongue
Here’s the single most important tip I can give you for mastering the bunched R: firmly brace the sides of your tongue against your upper back teeth, or molars. This one action creates the stability you need for a clear, strong sound.
Think of it like building an archway. The sides of your tongue pressing against your molars are the foundational pillars. Without them, the arch—the bunched center of your tongue—collapses. Air spills out the sides, creating a weak or distorted sound. This bracing is a non-negotiable part of the process.
The feeling you’re going for is firm, consistent pressure along both sides of your tongue. If you can’t feel that engagement with your molars, your R sound just won’t have the crispness it needs.
From Sound to Words
Once you can feel that anchor point, you’re ready to start making the sound.
- Isolate the Sound: Begin by just holding an “errrr” sound. Focus entirely on maintaining that strong brace against your molars and feeling the tension in the body of your tongue.
- Move to Simple Words: Next, try it with words where the R is the main event, like her, fur, and bird. Don’t rush. Feel the transition into the R shape and hold it for a moment before finishing the word.
- Use a Mirror: Watch your mouth as you practice. Your lips should be pretty neutral or slightly pulled back, not rounded like you’re saying “w.” If you see your lips puckering, you’re accidentally substituting a /w/ for the /r/, a very common issue.
This focused practice is how you build the new motor patterns required for a consistent American R. Building this kind of control is central to accent clarity. For more strategies on developing this precision, check out our guide on how to train your mouth for a better American accent.
Exploring the Retroflex R Tongue Position
If the bunched ‘r’ just isn’t clicking for you, don’t worry. The retroflex R might be the breakthrough you’ve been looking for. It’s a powerful alternative that focuses on a completely different part of the tongue—the very tip.
While it’s less common among native English speakers, I’ve seen countless clients find this position far more intuitive and easier to master. For some, it’s the key that finally unlocks a clear American R.
The whole idea behind the retroflex R is to curl the tip of your tongue up and back toward the hard palate (the bony roof of your mouth). The critical detail here is that the tip gets close, but it should never actually touch the palate. This creates a very specific channel for air to flow through, which is what produces that distinct R sound.

This movement is all about isolating the front of your tongue while the rest of it stays relatively stable and relaxed. It’s a subtle, precise action that can be a game-changer, especially for speakers whose native languages already use similar retroflex consonants, like those found in many Indic or Slavic languages.
Finding the Retroflex Position
One of the most effective exercises I use with my clients is what I call the “L to R slide.” It’s a fantastic way to feel the correct movement in your own mouth without overthinking the anatomy.
Here’s how to do it:
- Start with an ‘L’ sound. Begin by making a clear, crisp “L” sound, as in the word “light.” Really feel where the tip of your tongue is pressing—it should be firmly on the alveolar ridge, that bumpy spot right behind your upper front teeth.
- Slide it back slowly. Now, keeping your tongue tip touching the roof of your mouth, slowly drag it backward along the hard palate.
- Lift and release into the sound. As you slide back, you’ll feel the point where the hard palate starts to curve upward. Right as you get to that curve, lift your tongue tip just slightly away from the palate and let the “errr” sound come out.
That sliding motion is your guide. It physically walks your tongue into the perfect curled-back position. Remember, the goal is a gentle curve, not a tight, tense curl that feels forced.
A common mistake I see is over-curling the tongue, which can create a muffled or distorted sound. The retroflex R is about a light, upward gesture of the tongue tip, not a forceful backward flip.
Essential Do’s and Don’ts
As you get the hang of this position, keep these pointers in mind. They’ll help you refine your technique and avoid the most common traps.
- DO keep your jaw relaxed and slightly open. A tense jaw is the enemy of good tongue movement.
- DON’T let your lips round forward. Just like the bunched R, the retroflex R doesn’t need any lip puckering. Keep them neutral to steer clear of an accidental “w” sound creeping in (“wight” instead of “right”).
- DO feel the sides of your tongue making light contact with your upper molars. This gives you stability. It’s not as forceful as the bunched R brace, but this contact helps channel the airflow right where it needs to go.
- DON’T touch the roof of your mouth when you’re making the final sound. That tiny space between your tongue tip and palate is absolutely essential for a clear R.
Mastering the retroflex R really comes down to developing fine motor control over the tip of your tongue. By practicing the “L to R slide” and being mindful of these do’s and don’ts, you can build the muscle memory needed for a consistent, crystal-clear American R sound.
Common Mistakes and How to Fix Them
Knowing the right tongue placement is only half the battle. Just as important is recognizing when you’re slipping into old, unhelpful habits. Even with perfect instructions, it’s incredibly easy for your tongue and lips to do what they’ve always done.
This section is your troubleshooting guide. We’ll walk through the most common errors that derail progress and give you targeted, actionable fixes to get you back on track.
The ‘W’ for ‘R’ Substitution
This is probably the most frequent issue I see. You think you’re saying “red,” but what actually comes out is “wed.”
This mistake almost always comes down to your lips, not your tongue. To make a ‘w’ sound, your lips naturally round forward into a tight circle. But a clean American R needs your lips to be either neutral or pulled back slightly, almost like a flat smile.
The fix is simple: grab a mirror. Intentionally hold a slight, tense smile as you say words like “right,” “run,” and “road.” This physical constraint makes it impossible for your lips to round forward, which forces your tongue to step up and do the real work.
The Weak or Vowel-Like R
Another common problem is the weak or vowel-like ‘r’. This is when your ‘r’ sound lacks any real crispness and ends up sounding more like “uh.” Think “fuh” instead of “fur.”
What’s the culprit? A lack of tongue tension.
This error is a dead giveaway that the body of your tongue isn’t properly braced against your upper molars. Without that essential anchor, your tongue stays too relaxed and floppy, failing to create the two crucial narrowings needed for a strong, resonant R sound.
The fix here is all about re-focusing on the sensory feedback from inside your mouth. Before you even make the sound, consciously push the sides of your tongue firmly against your back teeth. Hold that tension. Now, say “errr” and feel the stability that bracing creates.
The Glided R That Slides Out of Position
Finally, we have the ‘glided’ R. This happens when you start the R sound correctly, but your tongue doesn’t hold its position, sliding out of place before the sound is finished.
You might nail the “r” in a short word like “car” but then struggle with a longer word like “around,” where the ‘r’ just seems to fade away halfway through. This is purely a muscle endurance issue. Your tongue knows what to do, it just doesn’t have the strength yet to maintain the correct tongue placement for r through longer words or phrases.
To build that stamina, you need to focus on specific drills:
- Prolonged Sounds: Practice holding a single, solid “errrr” sound for 3-5 seconds. The goal is to keep the quality consistent from start to finish.
- Repetitive Syllables: Drill syllables that force your tongue to stay put, like “ra-ra-ra” and “ri-ri-ri.”
- Contrasting Pairs: Practice word pairs that challenge your tongue to move into and out of the ‘r’ position quickly and accurately, such as “light-right” and “low-row.”
By figuring out exactly which error you’re making, you can apply these targeted fixes to build the precision and muscle memory needed for a consistent, clear American R.
Here’s a quick-reference table to help you diagnose and correct these common issues on the fly. I find that having a clear “if this, then that” guide can be incredibly helpful when you’re feeling stuck.
Troubleshooting Common R Sound Errors
| Common Error (What it sounds like) | The Cause (Why it’s happening) | The Fix (A targeted drill) |
|---|---|---|
| The “W” Sound (e.g., “wed” for “red”) | Your lips are rounding forward instead of staying neutral or spread. The lips are doing the work, not the tongue. | Practice R words in front of a mirror while holding a flat smile. Say: “right,” “road,” “really.” |
| The “Weak R” (e.g., “fuh” for “fur”) | There’s not enough tension in the body of your tongue. The sides aren’t braced against your upper molars. | Consciously push the sides of your tongue against your back teeth before making the sound. Hold “errr” and feel the tension. |
| The “Glided R” (e.g., the R in “around” disappears) | Your tongue muscle lacks the endurance to hold the R position through longer words or phrases. | Build stamina by holding the “errrr” sound for 3-5 seconds. Also, drill repetitive syllables like “ra-ra-ra.” |
By diagnosing the specific type of error you’re making, you can apply these targeted fixes. This isn’t just about random practice; it’s about smart, focused training to build the precision and muscle memory needed for a consistent American R.
Your Daily R Sound Practice Plan
Knowing how to place your tongue is one thing; building the muscle memory to do it automatically is another. Consistency is everything. This practical, 15-minute daily routine is designed to turn that abstract knowledge into a concrete habit, making a clear American R feel like second nature.
This isn’t just a random list of words. Think of it as a progressive training system. We’ll move logically from isolating the sound all the way to integrating it into natural speech, making sure you build a rock-solid foundation.
A Progressive Training System
Your daily session should always follow a clear progression. By starting small and gradually building complexity, you avoid frustration and reinforce the correct motor patterns from the get-go.
- Sound Isolation (2 mins): Start by simply holding the “errrr” sound. Your entire focus should be on the physical feeling of your chosen tongue placement—either bunched or retroflex. Get in front of a mirror and check that your lips aren’t rounding.
- Syllables (3 mins): Now, let’s add some movement. Move on to basic syllables, combining the R with different vowels. Practice sets like “ra-ra-ra,” “ree-ree-ree,” and “ro-ro-ro” to start building control.
- Single Words (5 mins): Next, tackle words with R in all three positions: initial (red, run), middle (around, carrot), and final (car, more). This is crucial for training your tongue to move into and out of the R position smoothly.
Mindful Practice Tip: Take one minute each day to record yourself on your phone. Listening back gives you that crucial, objective feedback you can’t get in the moment. It’s the best way to track your real progress and spot any recurring errors.
Finally, you’ll dedicate the last part of your session to drills that bridge the gap between practice and real-world conversation. This is where the new habit really starts to stick.
From Drills to Conversation
- Contrasting Pairs (2 mins): This part is key. Drill minimal pairs that force your brain to distinguish between your old habit and the new sound. Spend your time on pairs like wake/rake, light/right, and wove/rove.
- Short Phrases & Sentences (3 mins): Finish up by putting your R words into short, meaningful phrases. You can create your own sentences or use some fun and challenging vocal warm-ups and tongue twisters to keep things engaging.
Common Questions About Tongue Placement for the R Sound
Let’s dig into some of the most common questions that pop up when my clients are working on their American R. Getting straight answers to these can make a huge difference, helping you practice smarter and stay on track.
Is the Bunched or Retroflex R Better?
The short answer? Neither. There’s no “better” way. The best tongue placement for the R sound is simply the one that works for you—the one you can produce clearly and consistently every single time.
While it’s true that a majority of native speakers, maybe 60-70%, lean towards the bunched R, that doesn’t make it the superior choice. In fact, I’ve coached many clients whose native languages have curled-tongue sounds, and for them, the retroflex R feels far more natural. Your goal isn’t to perfectly copy one specific method, but to find your path of least resistance to that clear, crisp American R.
My advice is to play around with both positions. Really pay attention to the physical feedback from your mouth. Stick with whichever one feels more stable and gives you a stronger, more resonant “errr” sound.
Can I Switch Between the Bunched and Retroflex R?
Technically, yes, but I strongly advise against it, especially when you’re just starting out. The whole point of this practice is to build a single, automatic motor plan for the R sound. Trying to learn both at once is like trying to learn two different golf swings at the same time—it just leads to confusion, inconsistency, and slower progress.
Pick one method and commit to it. Make it your go-to, your default. Once you’ve completely mastered it and the sound flows effortlessly in conversation, then you could explore the other out of curiosity. But for achieving clear speech, it’s totally unnecessary. Focus on owning one position first. If you have more general questions about speech training and the tools involved, you might find some good information in this Frequently Asked Questions on speech training.
How Long Does This Realistically Take?
This is the million-dollar question, and the answer really comes down to one thing: consistency. Everyone’s timeline is different, but the progress driver is always the same.
With focused, daily practice of about 30 minutes, most learners start to feel a real shift in control and clarity within 8-12 weeks. Getting it to be completely automatic in fast, spontaneous speech will take longer, of course. But you’ll see and feel noticeable gains pretty quickly if your practice is targeted and consistent.
At Intonetic, we specialize in creating personalized practice blueprints to help you make those gains as efficiently as possible. Our structured coaching ensures you’re not just practicing, but practicing the right way. Book a free discovery call and we can build your personal roadmap to a clearer, more confident American accent.